Stuffed Rainbow Chard Rolls with a Simple Garden Veggie & Tomato Sauce ((with a BONUS extra meal))

One of my favorite things is to use my garden harvest in meal-making for the family. My rainbow chard has been growing like CRAZY this year… causing me to have daydreams of chard recipes. This recipe is a result of one of those daydreams!


These pictures were taken about a month ago & the rainbow chard has since doubled in size. I have 4 more rainbow chard plants, all spaced throughout my flowerbeds, doing equally wonderfully great!
Before I start sharing my recipe tips and instructions, let me take a minute and let you in on one of my favorite gardening ideas. Don’t reserve your flowerbeds for ornamental plants – use edible plants for your ornamental spots. This rainbow chard is absolutely gorgeous! Striking greens, orange, white, golden and magenta ribs. It is one of my favorite things to stick around my gardens. It reaches a height of 24″-30″ and is a real show stopper.
Other edible ornamental ideas that I love:
- sorrel
- chard
- kale
- radicchio
- lemongrass
- thyme
- beets
- chives
- rosemary
- curly spinach
- strawberries
These are just a few ideas – there are hundreds!

Okay, back to the recipe. I used the classic 4 ((celery, onion, bell pepper & carrots)) some garden-fresh thyme & parsley, garlic & lemon zest.

Give the chard a rinse (if you don’t have chard in your garden, most grocery stores are selling chard now), bring a pot of water to boil & give each leaf a 3 sec dip in the boiling bath. Be sure not to go longer than 5 seconds, we want to keep this gorgeous chard bright and fresh looking.

Lay out the parboiled chard on a bed of paper towels. Cut the rib out of each leaf, if the leaves are huge, cut them in half lengthwise.

Now, pause here and prepare the chard roll filling.

Mix it up by hand or with a spatula (get ready to work your arms – feel the burn!)

This is a party for the eyes!

Once the meat mixture is prepped, time to make the sauce. I saved 2-3 T of each: celery, bell pepper & onion, sautéed them for 3-5 minutes. Then poured a carton of tomato sauce over the veggies, seasoned, brought to a simmer & pour one cup of sauce into the bottom of the baking dish. Set the sauce aside to pour over the rolls.

Rolling them up is the fun part – aren’t they cute??


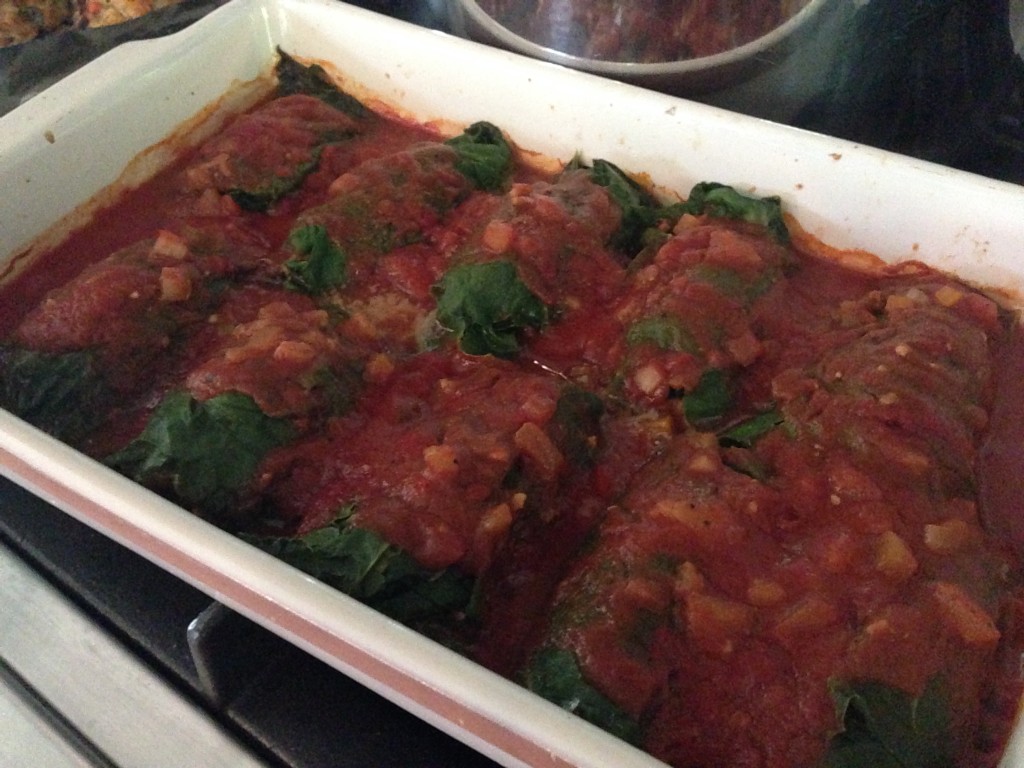
I made 14 rolls & baked 4 more in another small dish for David’s lunch – he was a happy boy! One very important tip – DO NOT squeeze these babies in the baking dish, give each roll a little space to breathe. Notice in the picture below, I offset the rolls. The ensures even cooking.

Top with the remaining sauce, cover with foil & bake for 30 minutes.
- 5-6 large rainbow chard leaves (or 10-12 small ones)
- 2 lb ground chicken breast ((and/or ground chicken thigh))
- 1 lb ground pork
- 1 yellow bell pepper, finely diced*
- 1 green bell pepper, finely diced*
- 4 celery stalks (leaves included), finely diced*
- 2 medium carrots, finely diced*
- 2 green onions, finely chopped
- 2 T capers, finely chopped
- 1/2 large sweet onion, finely diced*
- 1/2 c fresh parsley, chopped
- 3-4 T fresh thyme, chopped
- zest of one lemon
- 1 clove of garlic, finely chopped
- 1/2 c tomato sauce (from a 33.5 oz carton of tomato sauce - use remaining for sauce)
- 1 & 1/2 t McCormick steakhouse seasoning (I like Montreal Style)
- 2 eggs
- 1 c panko
- 33.5 oz carton of tomato sauce
- *2-3 T of each reserved veggie
- 1/2 t steakhouse seasoning
- 1-2 dashes of garlic salt
- Preheat oven to 350°. Fill a large stockpot with water & bring to a boil. While waiting for water to boil, prepare chard by giving it a good rinse.
- In a large mixing bowl, combine meat, veggies*, binder & seasonings - I used a wooden spoon to combine ((arms got tired haha)) but you can use a mixer & a paddle attachment.
- Pour sauce ingredients into a medium soup pot. Stir and bring to a simmer - cook an additional 5 minutes. Turn off heat and set aside to pour over chard rolls.
- Once water is boiling, holding the chard by the stem, dip the leafy portion of the chard into the boiling water for 3-6 seconds. Tap the extra water off and place on a stack (3-4) of paper towels. Repeat with each leaf until all of the leaves have been parboiled. Once leaves are patted dry, cut the stalk & rib out of the leaf & cut each in half.
- Place 1 c of sauce into the bottom of a 9"x13" casserole dish.
- Lay one half of the chard leaf out on a flat surface & using a 6 oz scoop, place 1 scoop of the filling mixture in the far left 1/4 of the leaf (leave about 3" to the left of the filling). Roll up the short side, over the filling & tuck the sides into the roll (like a burrito). Continue rolling until the end of the leaf is reached. Place in casserole dish. Repeat with remaining leaves. When placing rolls in the dish, place them slightly off-set from each other to allow a bit of space around each individual roll - for even cooking.
- Top with remaining sauce. Cover with foil & bake in oven for 30 minutes.
- *Notice the veggies identified with a * - and reserve 3 T of each to add to the sauce.

Twenty to be exact!
 I baked them at the same time I baked the chard rolls, cooled them, bagged them up & refrigerated them. Last night, I placed them in a baking dish, poured the extra sauce over them, covered them with foil and reheated them in the oven at 350° for 30 minutes. I served them over spaghetti and the kids larded it up. What a simple, healthy & tasty meal for a busy weeknight.
Hope you and your family enjoy this double meal as much as we did!